WHAT’S THIS FOR:
Background entities are what makes the level scenery.
Background objects can collide or not with the player and bullets. You can also use layers to add several layers of backgrounds and make them scroll at different speeds.
PROPERTIES
 SETTINGS TAB
![]() Name text field: the name of the object.
Name text field: the name of the object.![]() Cast shadow checkbox: if checked, the object will cast a shadow on other objects.
Cast shadow checkbox: if checked, the object will cast a shadow on other objects.![]() Orientation: the orientation of the background. It’s the orientation of the game object, not the graphic asset.
Orientation: the orientation of the background. It’s the orientation of the game object, not the graphic asset.
2D sprites:
![]() Animation speed spinner: if the texture contains several frames, this setting allows to choose the animation speed.
Animation speed spinner: if the texture contains several frames, this setting allows to choose the animation speed.![]() Columns spinner: set the number of columns of the texture atlas.
Columns spinner: set the number of columns of the texture atlas.![]() Rows spinner: set the number of rows of the texture atlas (see “animating sprites” section for more information).
Rows spinner: set the number of rows of the texture atlas (see “animating sprites” section for more information).
RENDERING ORDER
name of the layer: just to remind you where is your sprite![]() order in layer: allows you to choose if your sprite is back or front, if you want a sprite is behind or in front of another one INSIDE ITS LAYER.
order in layer: allows you to choose if your sprite is back or front, if you want a sprite is behind or in front of another one INSIDE ITS LAYER.

RULES INSIDE A LAYER

First: Backgrounds are ALWAYS rendered FIRST >> Enemies are always on top

Second: the first sprite rendered is "1" (then the sprite that looks the farthest)

Third: it's possible to have several times the same number but mind the overlap of sprites that creates flickering.
Example:
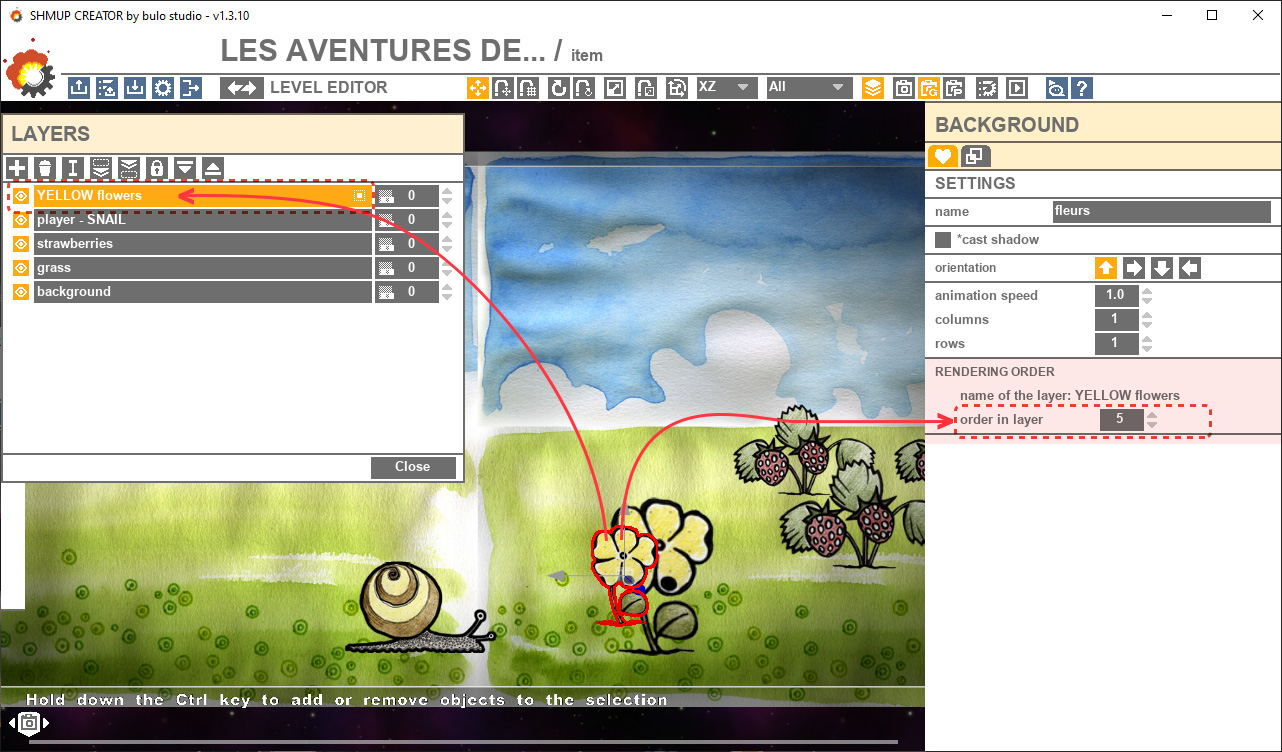
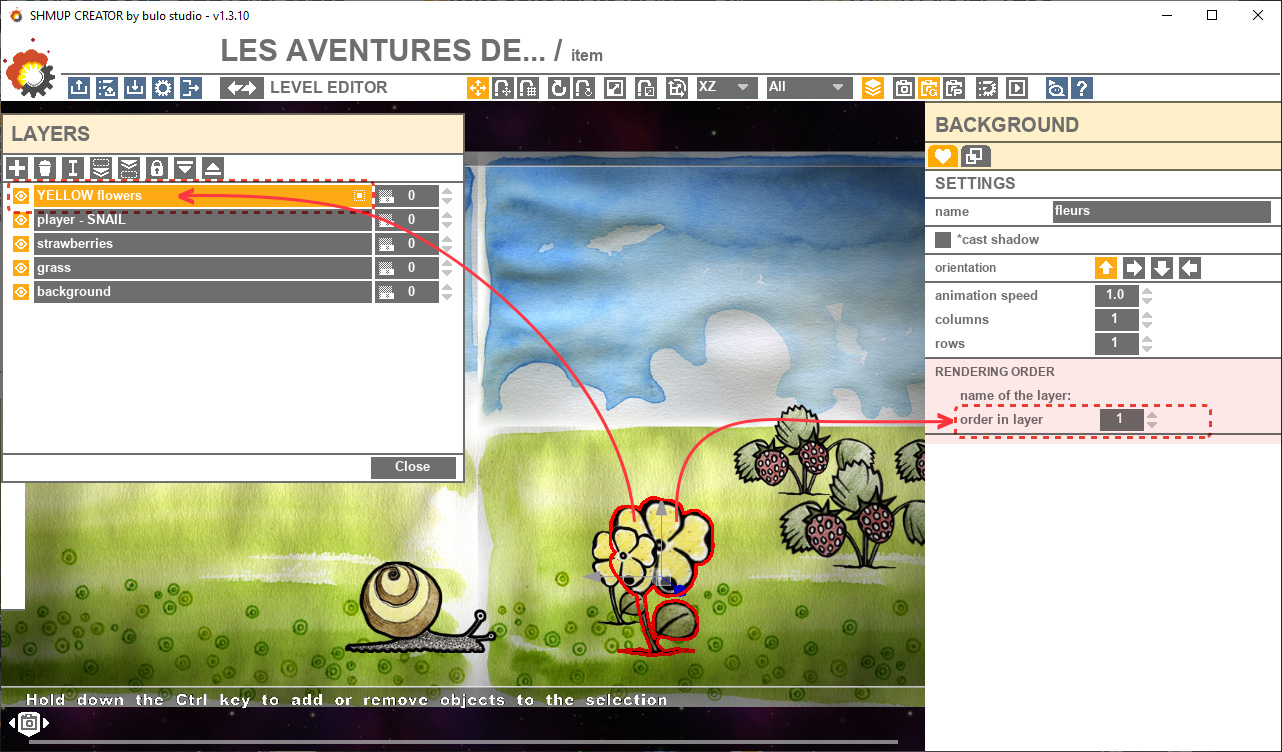
These 2 flowers are in the same layer.
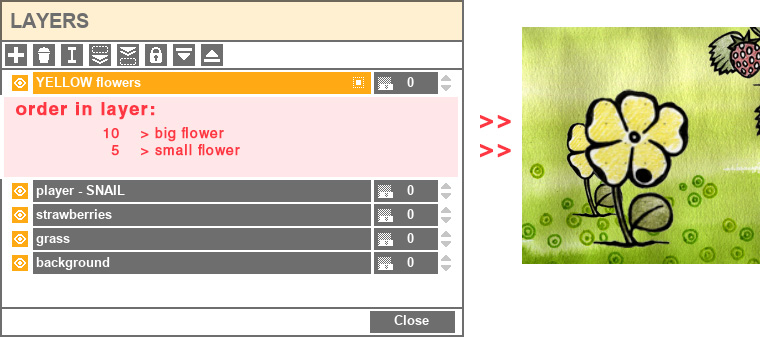
The big flower should have been in front of the small one to simulate perspective.
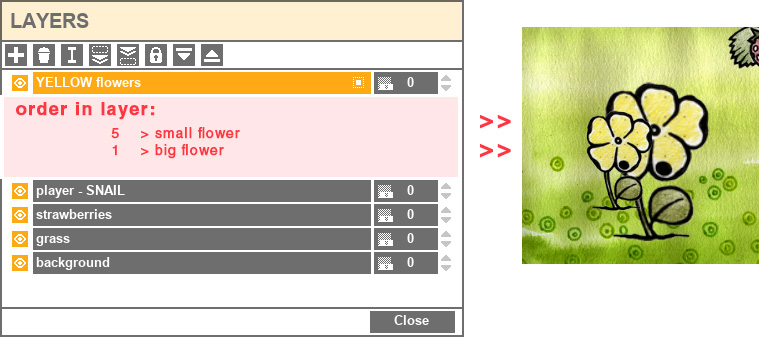
At the moment the big one is behind the small one.
Let’s see their rendering order:
The small one, order in layer =5
The big one: order in layer =1
And the result is:
To put the big flower in front of the small one, the order is needed to be changed.
 COLLISION TAB
2D SPRITES:![]() No collisions: the object will not collide with other objects. If you don’t need a collision, choose this option as it will speed up the computations.
No collisions: the object will not collide with other objects. If you don’t need a collision, choose this option as it will speed up the computations.![]() Collision shape: the object will collide, using one or several collision shapes.
Collision shape: the object will collide, using one or several collision shapes.
 Add button: Add a new collision shape
 Delete button: Delete the current collision shape
 navigation arrows: Navigate between the different collision shapes
 Reset button: reset the collision shape
 Auto collision button: the tool tries to create a shape following the picture contours.
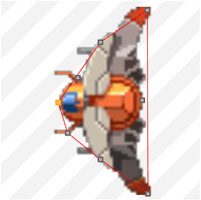 Collision window: move the points to build the shape of your collision
![]() Point position x / y edit boxes: allow to move precisely the the selected point.
Point position x / y edit boxes: allow to move precisely the the selected point.
Notes:
. The collision shape is always convex, so you can't create any shape. This is why sometimes you need to add several collision shapes to create the right shape.
. You don't always need a super precise shape. It's a shmup: think gameplay first, and try to not add too many collision shapes to an object!
3D OBJECTS:
![]() : add a new collision shape
: add a new collision shape![]() : delete the current collision shape
: delete the current collision shape![]() : navigate between the different collision shapes.
: navigate between the different collision shapes.
![]() No collision radio button: the object will not collide with other objects. If you don’t need a collision, choose this option as it will speed up the computations.
No collision radio button: the object will not collide with other objects. If you don’t need a collision, choose this option as it will speed up the computations.![]() 3D mesh radio button: the collision shape is the same as the 3D mesh. It’s the most expensive collision shape, but also the more precise.
3D mesh radio button: the collision shape is the same as the 3D mesh. It’s the most expensive collision shape, but also the more precise.![]() Convex hull radio button: the collision shape is automatically created as a convex hull. It’s not as precise as the triangle mesh, but is often enough.
Convex hull radio button: the collision shape is automatically created as a convex hull. It’s not as precise as the triangle mesh, but is often enough.![]() Sphere radio button: the collision shape is a sphere. Very fast collision type.
Sphere radio button: the collision shape is a sphere. Very fast collision type.![]() Capsule radio button: the collision shape is a capsule. Very fast collision type.
Capsule radio button: the collision shape is a capsule. Very fast collision type.![]() Cube radio button: the collision shape is a cube. Very fast collision type.
Cube radio button: the collision shape is a cube. Very fast collision type.
Note: you can add several 3D collision shapes to one object. Note that this collision is a 3D collision, unlike the collisions of the enemies, player and items, which are 2.5D collisions. See "How the collisions work" for more on this subject.
