- How-to play your game in Tate windowed mode
- How-to setup parallax scrolling
- How-to setup stripe shadows
- How-to bullet collision box
- How-to edit accurate player’s collision
- How-to add wallpaper images to the Pillar Box Bars Space
How-to play your game in Tate windowed mode
Right click on your desktop and choose Screen resolution and change the Orientation to Portrait. What’s new is that in a stand-alone game the windowed mode now keeps the Tate 3/4 window ratio.
Note: the start menu is not automatically resized, so for now you need to design it to be readable in any ratio.
Players can now rotate their screens by 90 degrees.
How-to setup parallax
There are 3 ways to setup parallax:
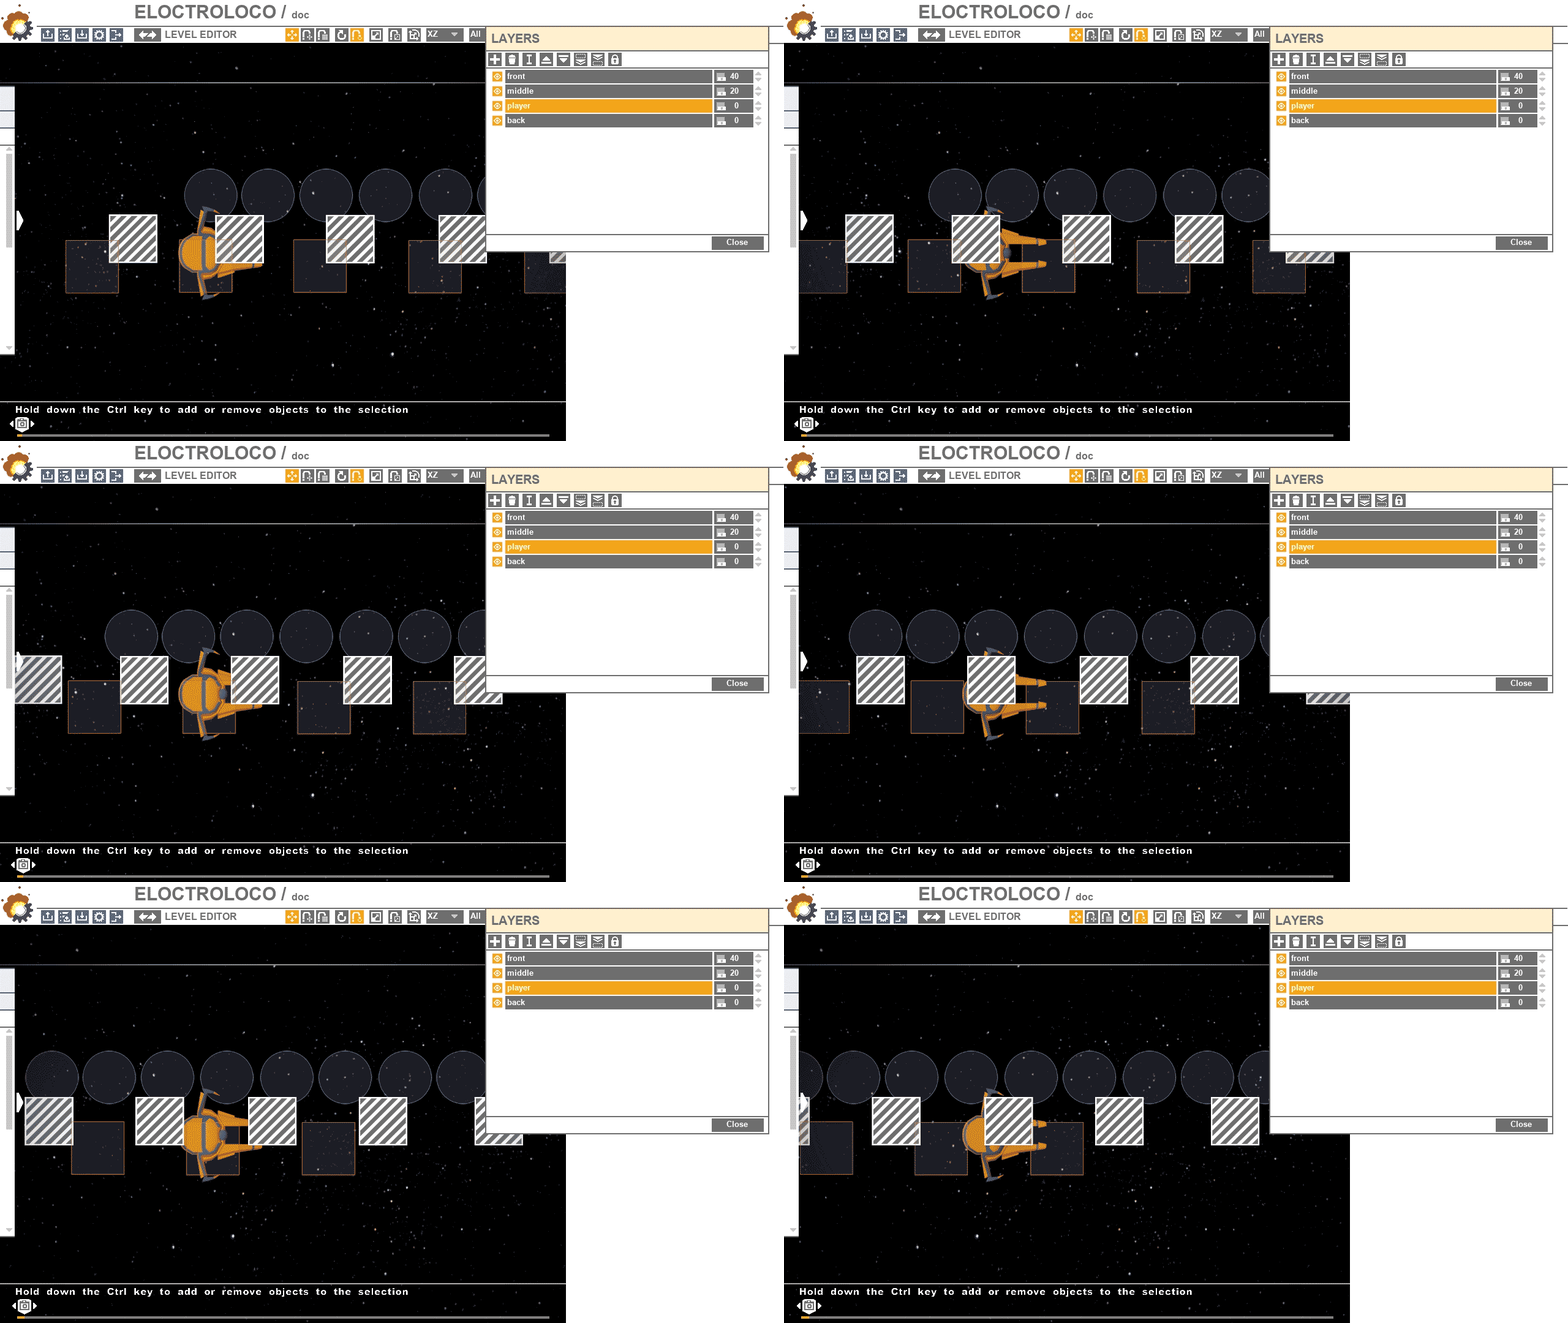
01. You could use the parallax scrolling control system accessed from the layers pallet.
Minus numbers will recede the layer (slow it down), numbers above 0 will bring objects forward (speed them up, making them appear in front of the player).
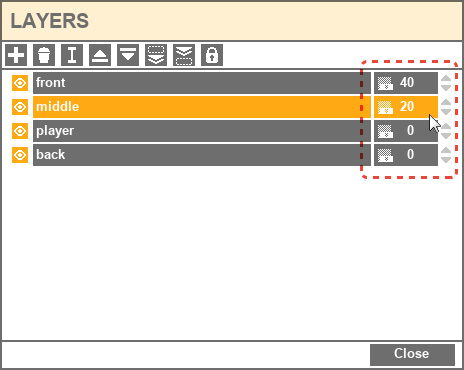
Note: Make sure the player is set to 0 on Y axis and everything will move relative to this 0 plane.
That also works with levels having multiple direction changes.
The parallax scrolling control system gives you full control over you want the backgrounds tiled or not and get the vertical scrolling without the tile problem.
02. You could also use the background parallax scrolling accessed from the level properties >settings>parallax scrolling options.
It is possible to scroll 5 pictures from front to back SCROLLING01, 02, 03, 04 and 05.
They have to be located in the C:\Users\your_pc\Documents\BuloStudio\Games\your_gane\Assets\Pictures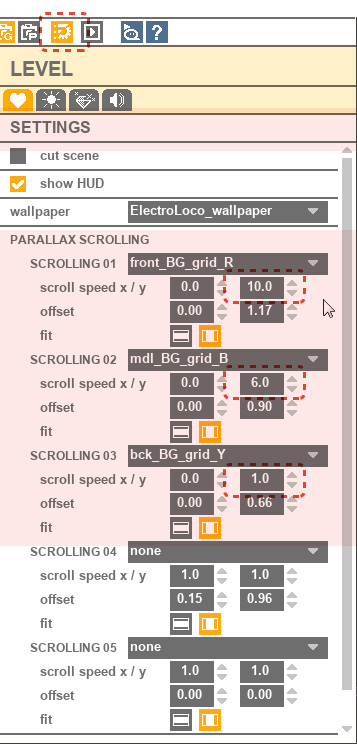
So, the RED grid is front and faster (y scroll speed = 10) than the Blue (y scroll speed = 6) than the yellow grid (y scroll speed = 1)
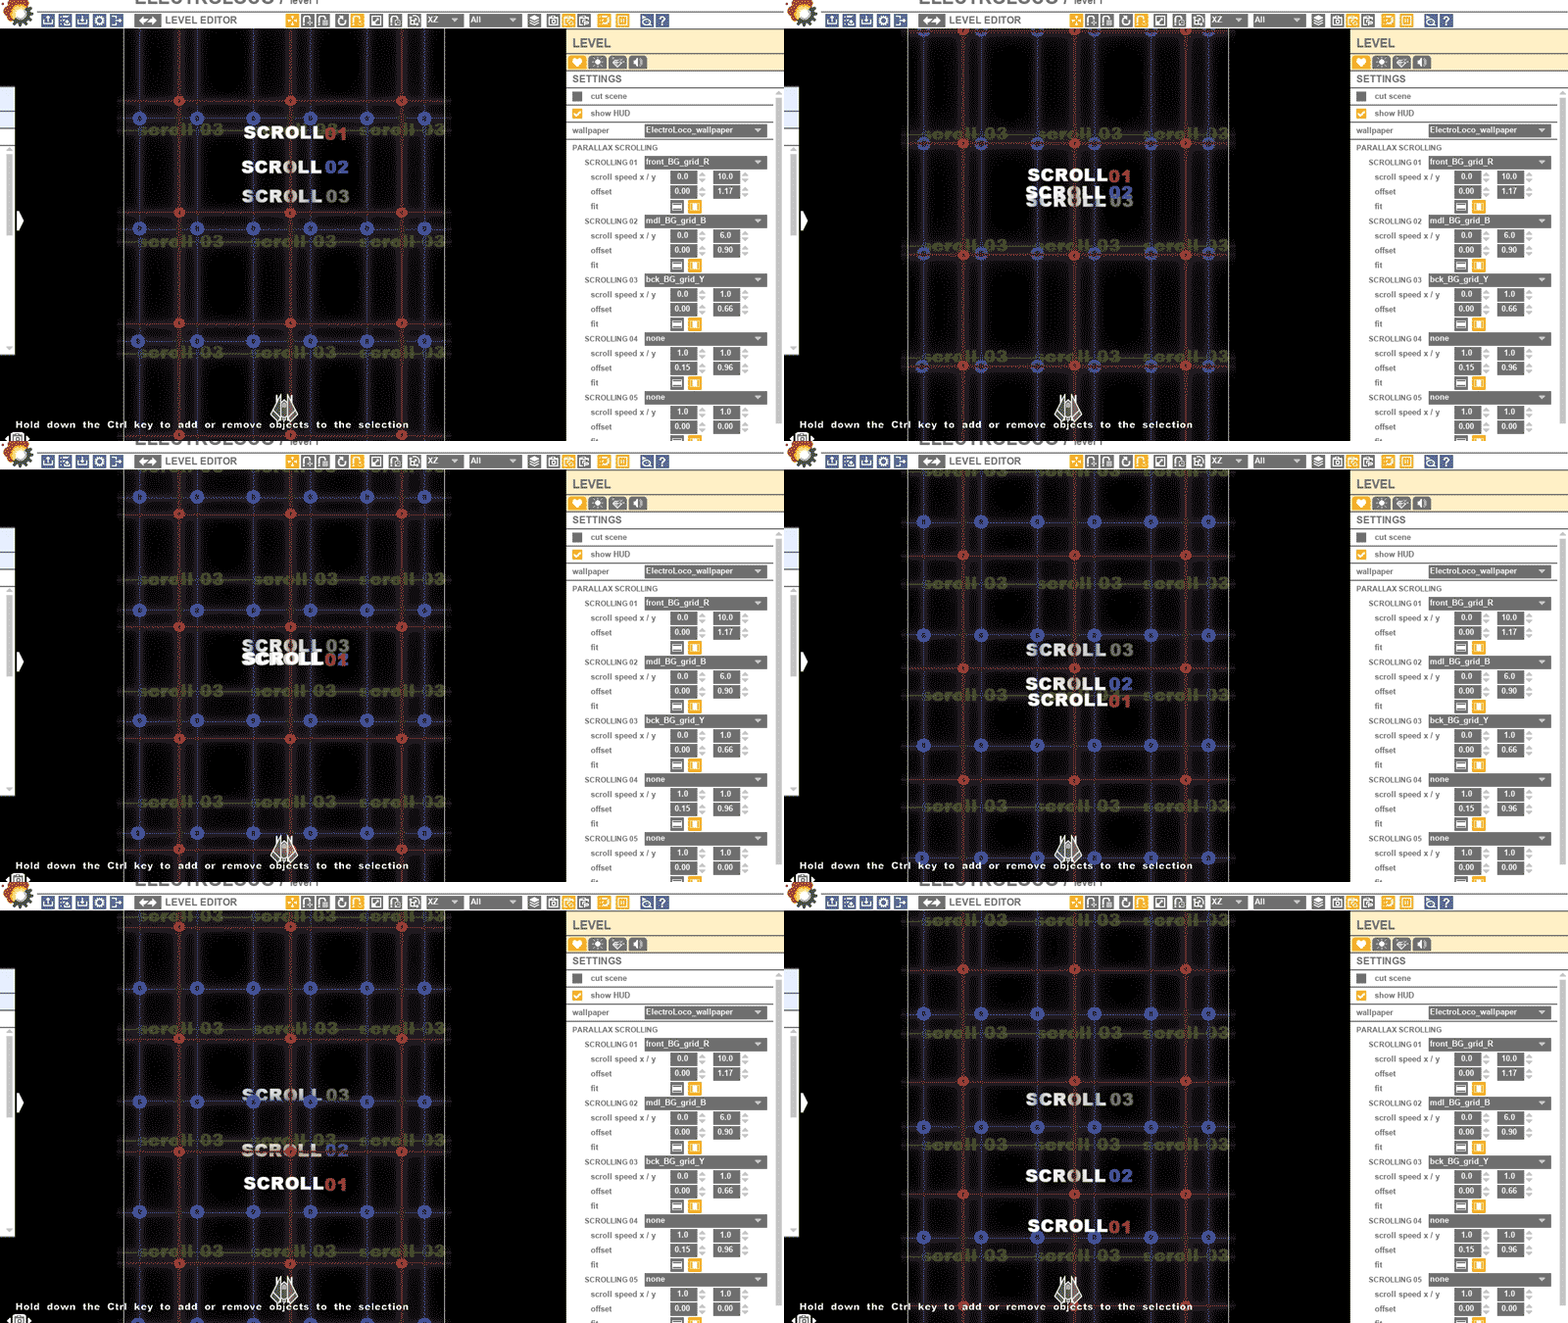
03. At last, it is possible to move the images forward or backwards on the Y axis, but the images relative pixel resolutions change.
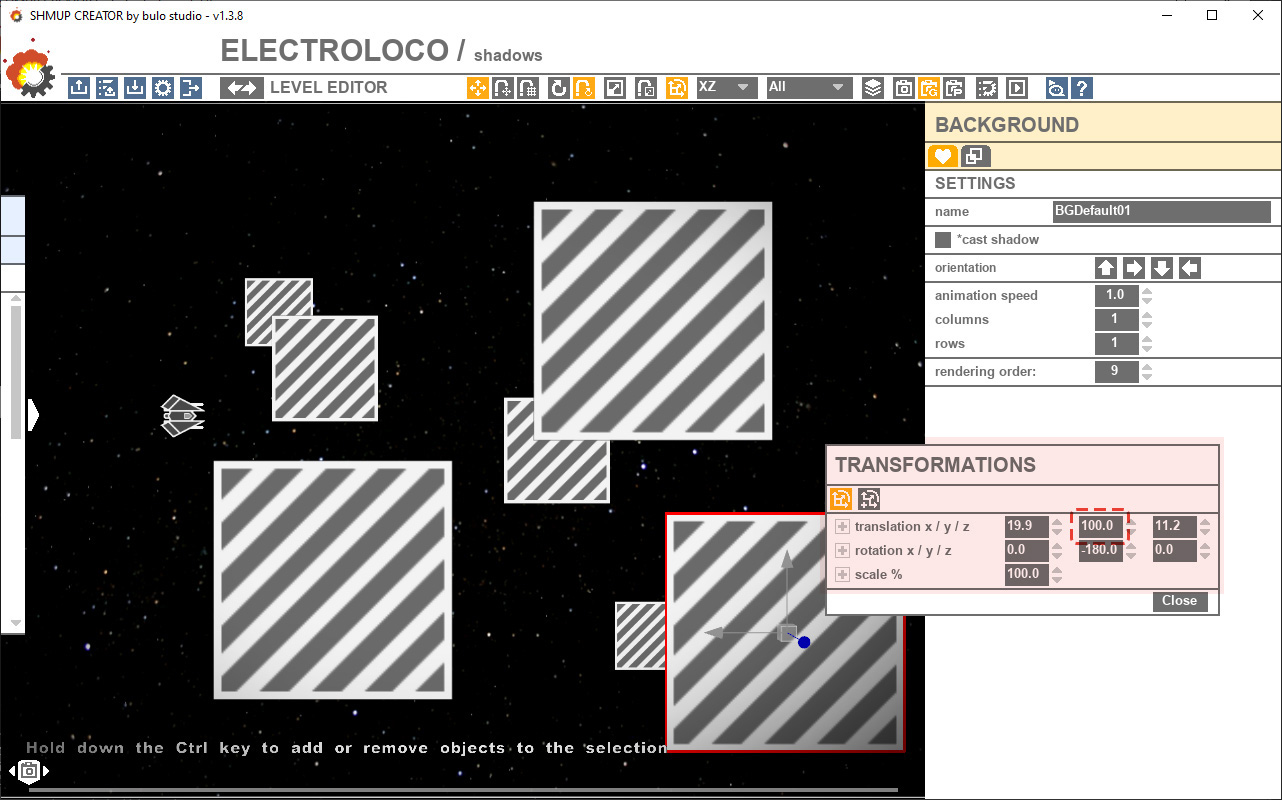
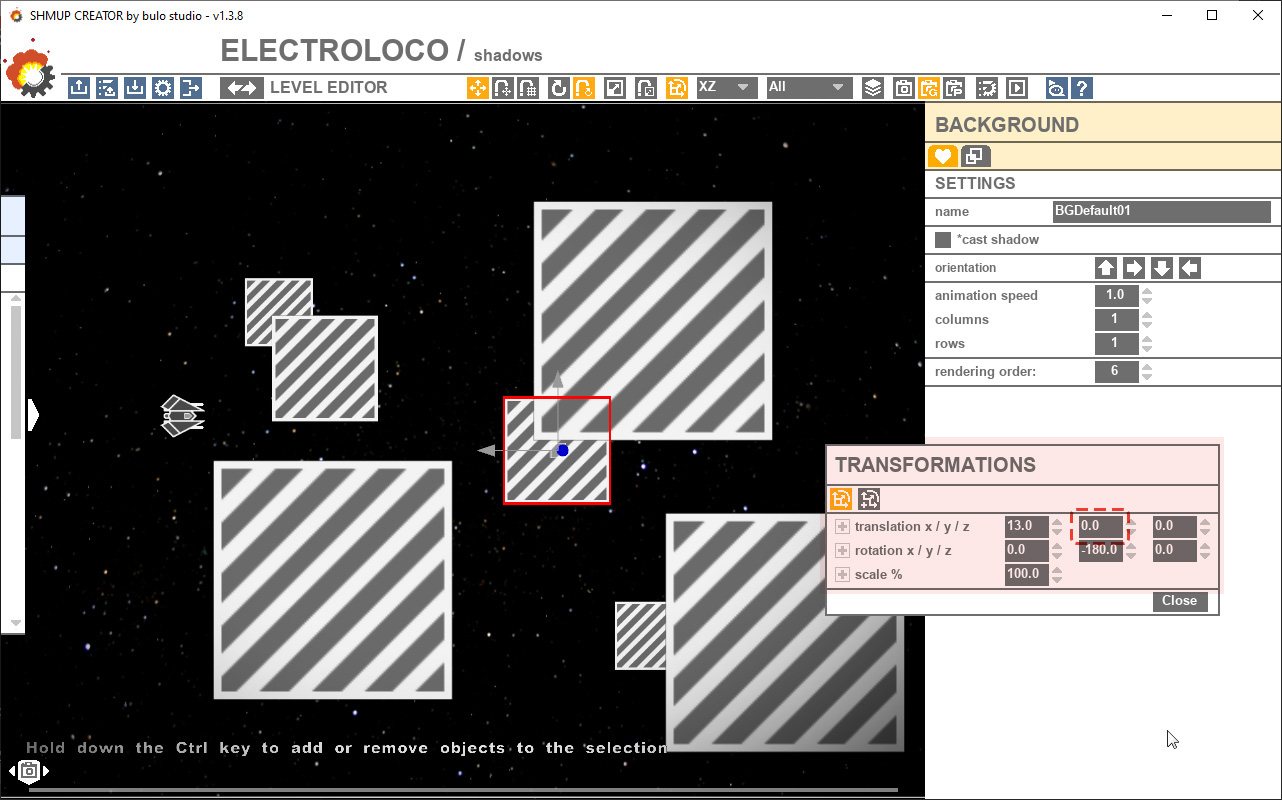
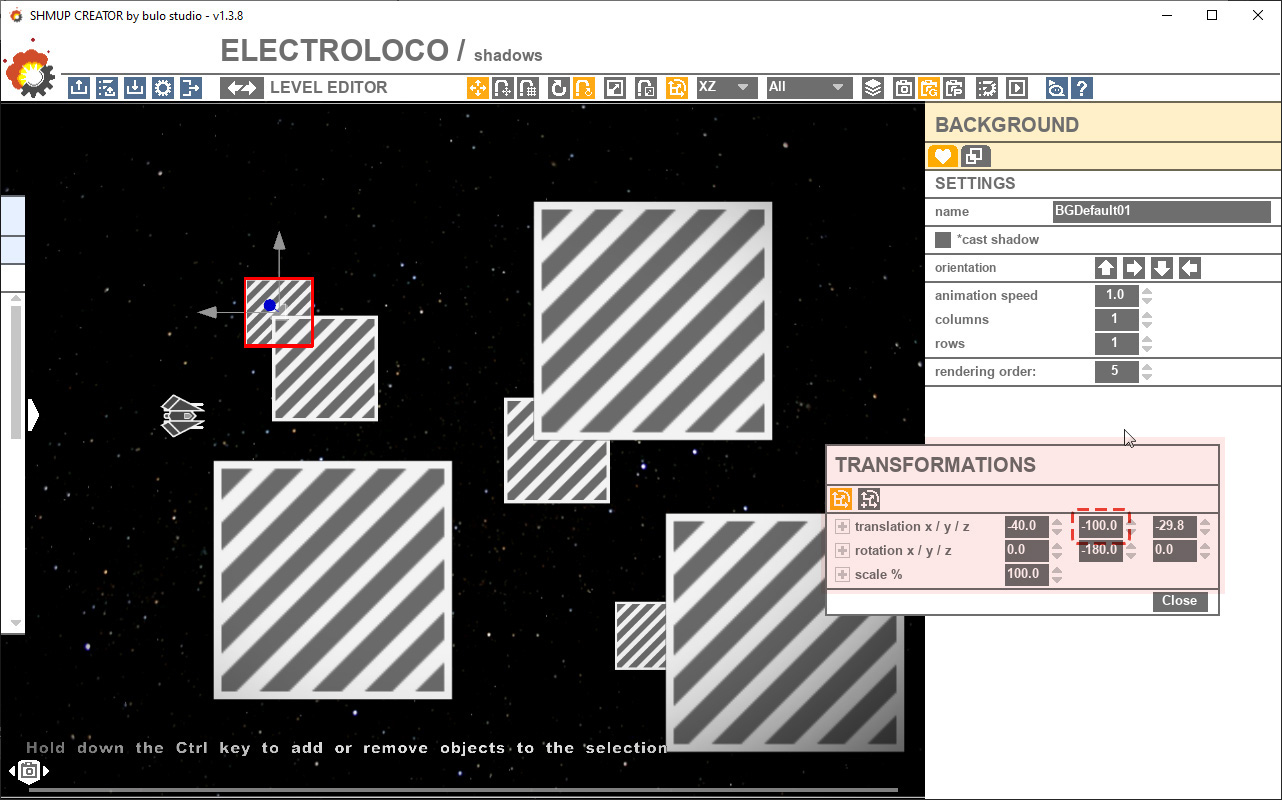
Note: Don't forget to set up your objects in different layers to create a forground, middleground and background.
How-to setup sprite shadows
Easy to setup but, there many places to check!
01. Level>lighting>sprite lighting
>> check the enable option
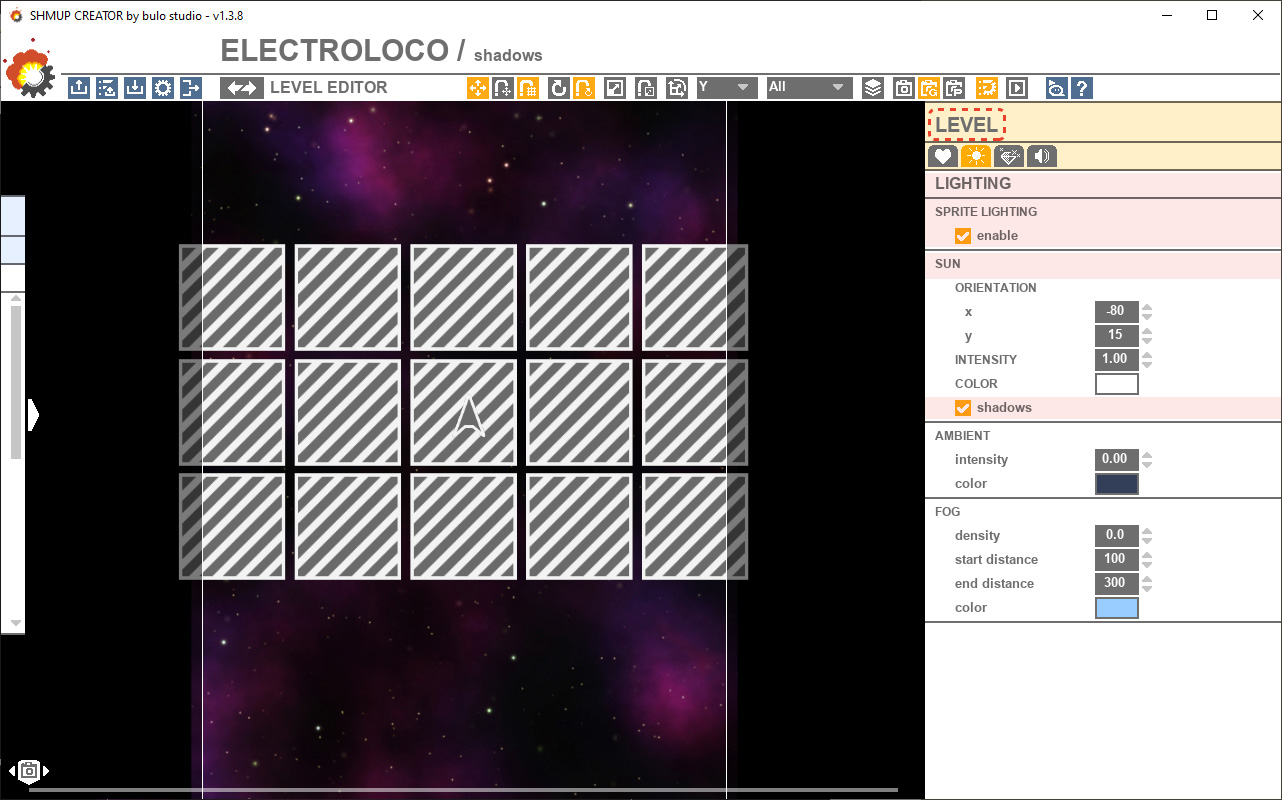
02. player>settings and>or enemy settings
>> check the cast shadow option
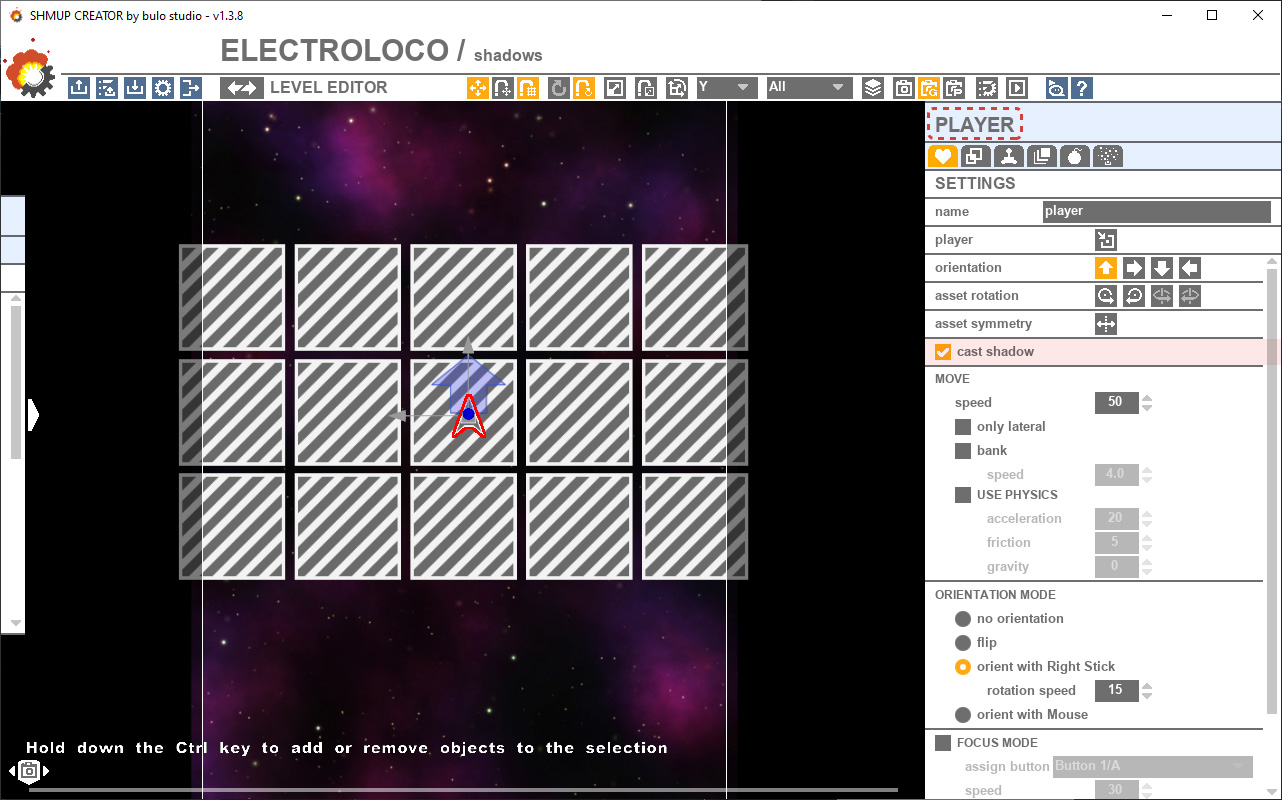
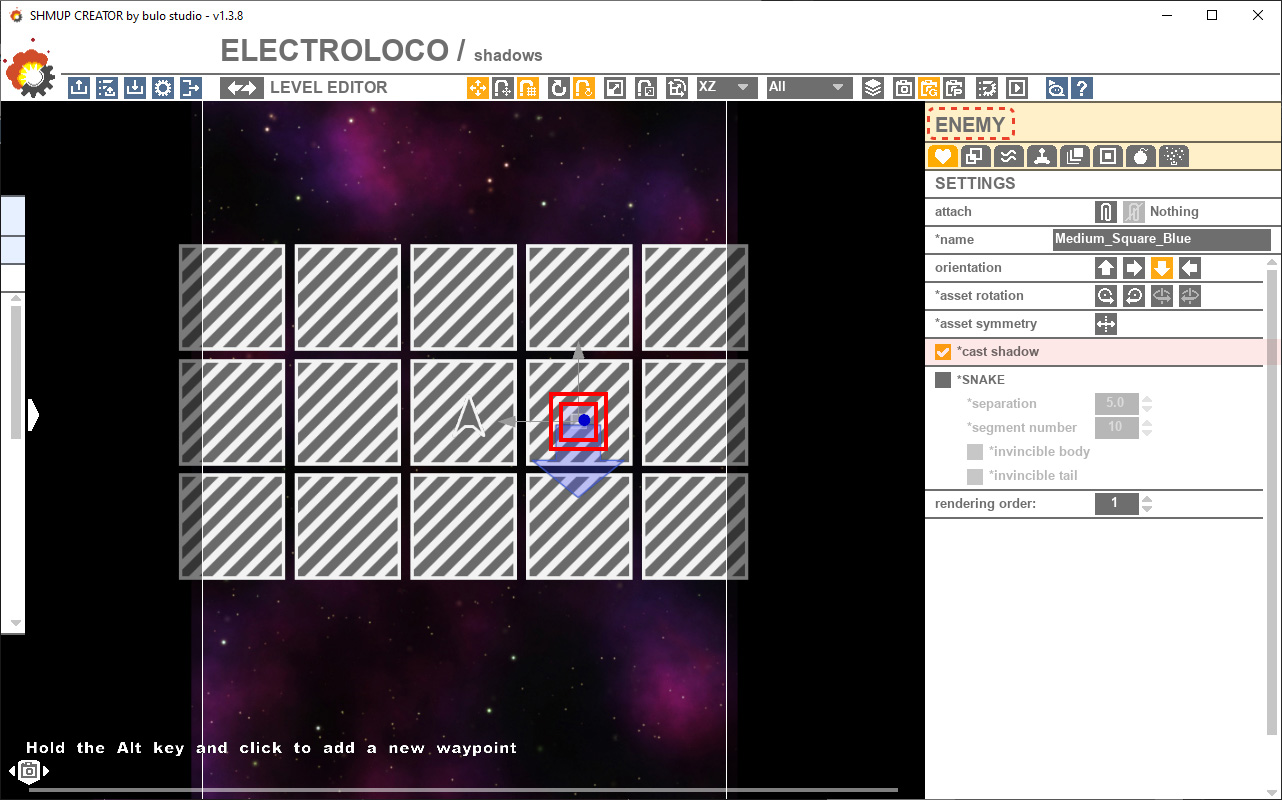
03. background>settings
>> check the cast shadow option
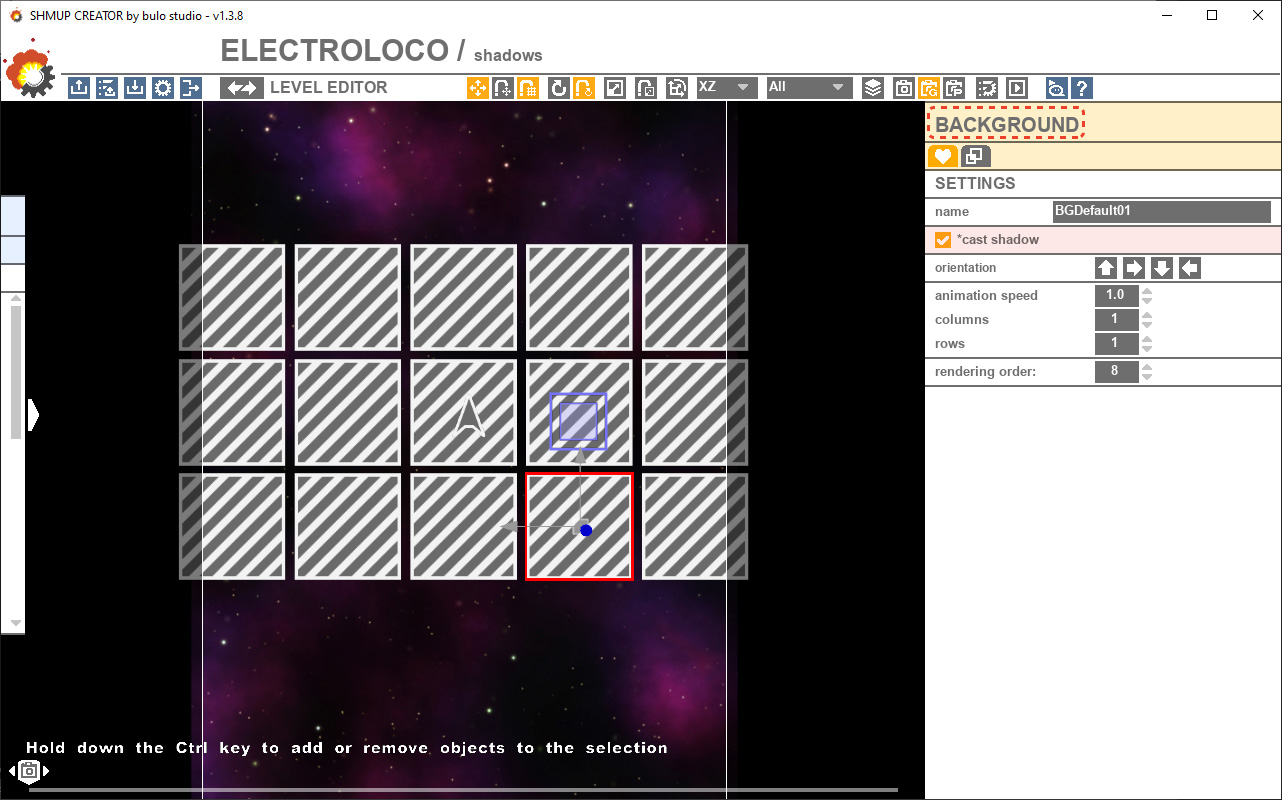
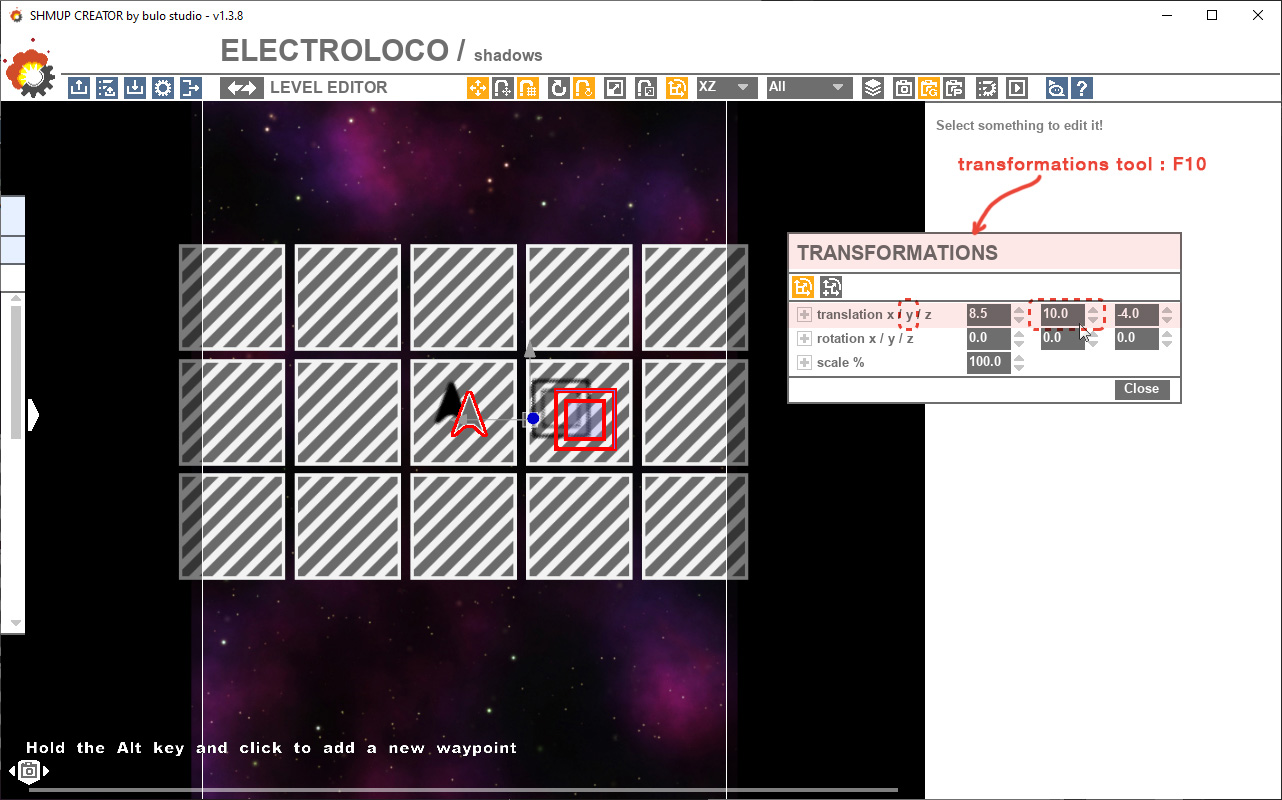
04. At last, the player and enemy need to be moved in y orientation to be far from backgrounds (which are placed in y = 0 by default).
>> The Y translation gizmo or the Transformations editor (F10) will help you to move your objects.
How-to view the bullet collision box
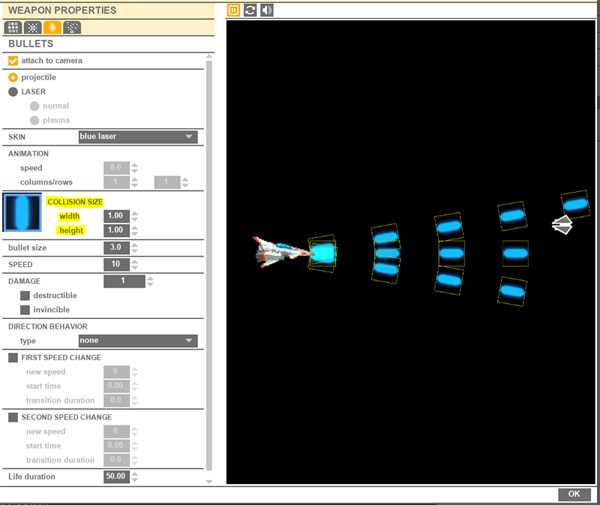
. Press F9 on the keyboard while you are in the Weapon Editor, you can then see the yellow bullets collision boxes appear in the level view. This makes it very easy to see what the bullet collision shape actually is. (Though viewing collision shapes may slow your frame rate down a bit).
. You can then edit the Bullet>Collision Size>width/height and see the exact changes to the yellow collision boxes in the level view.
How-to edit accurate player’s collision
01. Select the player
02. Press “F” to focus the player
03. In the player>collision tab, move the little squares to choose the collision and see your modifications straight in the level view.
Video version:
(by Rephlex and Dr Bosskey)
How-to add wallpaper images to the Pillar Box Bars Space*
* The wallpaper images of pillar Box Bars Space are the images on the right and left side of your game.
